React Bootstrap 설치
Bootstrap 라이브러리 설치 : react bootstrap 검색 (https://react-bootstrap.netlify.app/) - Get Started - npm ~~ 복사
- terminal창 붙여넣기
CSS 부분 복사 - App.js 상단에 붙여넣기

또는
이 부분 복사 - public/index.html - head태그 안쪽에 붙여넣기
React Bootstrap 사용
https://react-bootstrap.netlify.app/ - GetStarted - (ctrl + k)로 검색창 열기 - 검색
필요한 것(button) 검색 - 복사 - App.js 붙여넣기
* 가져온 컴포넌트는 import 해줘야 한다
* import 부분은 from 'react-bootstrap' 이다.
실행 결과

React 이미지 및 public폴더 이용
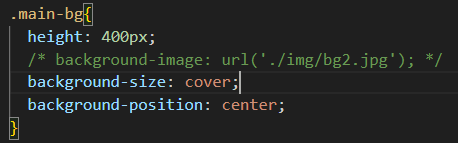
이미지 넣는법1 : css파일 - background-image: url('이미지 경로');
이미지 넣는법2 : App.js파일 - import 작명 from '경로'; - backgroundImage: 'url(' + 이미지 경로 + ')';
* <img src="경로"> 할 때, 다른 웹사이트에서도 가져와도 된다.
* 하지만, 저장한 사진을 가져올 때는, import를 해야하지만 public 폴더 안에 있는 사진을 가져올 때에는
* (./이미지 이름) 으로만 가져올 수 있다.
대신 process.env.PUBLIC_URL + '경로' 로 작성해야 효과적이다

import { Container, Nav, Navbar } from 'react-bootstrap';
import './App.css';
import bg from './img/bg2.jpg';
function App() {
return (
<div className="App">
<Navbar bg="light" data-bs-theme="light">
<Container>
<Navbar.Brand href="#home">ShopShop</Navbar.Brand>
<Nav className="me-auto">
<Nav.Link href="#home">Home</Nav.Link>
<Nav.Link href="#features">Cart</Nav.Link>
</Nav>
</Container>
</Navbar>
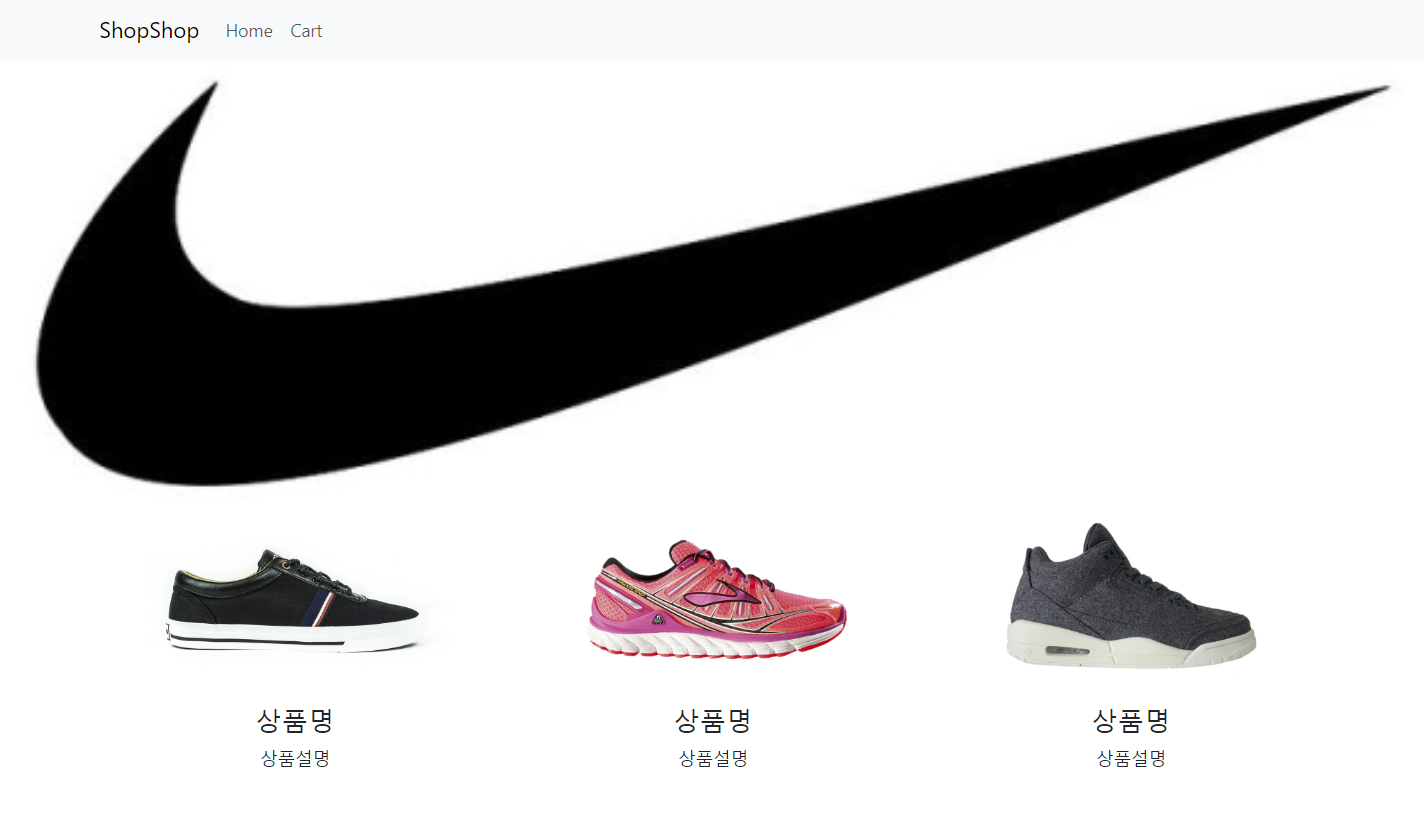
<div className='main-bg' style={{backgroundImage:'url(' + bg + ')' }}></div>
<div className='container'>
<div className='row'>
<div className='col-md-4'>
<img src='https://codingapple1.github.io/shop/shoes1.jpg' width="80%"></img>
<h4>상품명</h4>
<p>상품설명</p>
</div>
<div className='col-md-4'>
<img src='https://codingapple1.github.io/shop/shoes2.jpg' width="80%"></img>
<h4>상품명</h4>
<p>상품설명</p>
</div>
<div className='col-md-4'>
<img src='https://codingapple1.github.io/shop/shoes3.jpg' width="80%"></img>
<h4>상품명</h4>
<p>상품설명</p>
</div>
</div>
</div>
</div>
);
}
export default App;
실행 결과
React import & export
export
보낼 변수가 하나일 경우 = export default 변수명
보낼 변수가 여러개일 경우 = export {변수명, 변수명, ...}
import
받을 변수가 하나일 경우 = import 변수명 from '경로'
받을 변수가 여러개일 경우 = import {변수명, 변수명, ...} from '경로'
* 함수도 export, import 가능
import { Container, Nav, Navbar } from 'react-bootstrap';
import './App.css';
import bg from './img/bg2.jpg';
import { useState } from 'react';
import data from './data.js';
function App() {
let [shoes] = useState(data)
let [img] = useState(['https://codingapple1.github.io/shop/shoes1.jpg', 'https://codingapple1.github.io/shop/shoes2.jpg', 'https://codingapple1.github.io/shop/shoes3.jpg'])
return (
<div className="App">
<Navbar bg="light" data-bs-theme="light">
<Container>
<Navbar.Brand href="#home">ShopShop</Navbar.Brand>
<Nav className="me-auto">
<Nav.Link href="#home">Home</Nav.Link>
<Nav.Link href="#features">Cart</Nav.Link>
</Nav>
</Container>
</Navbar>
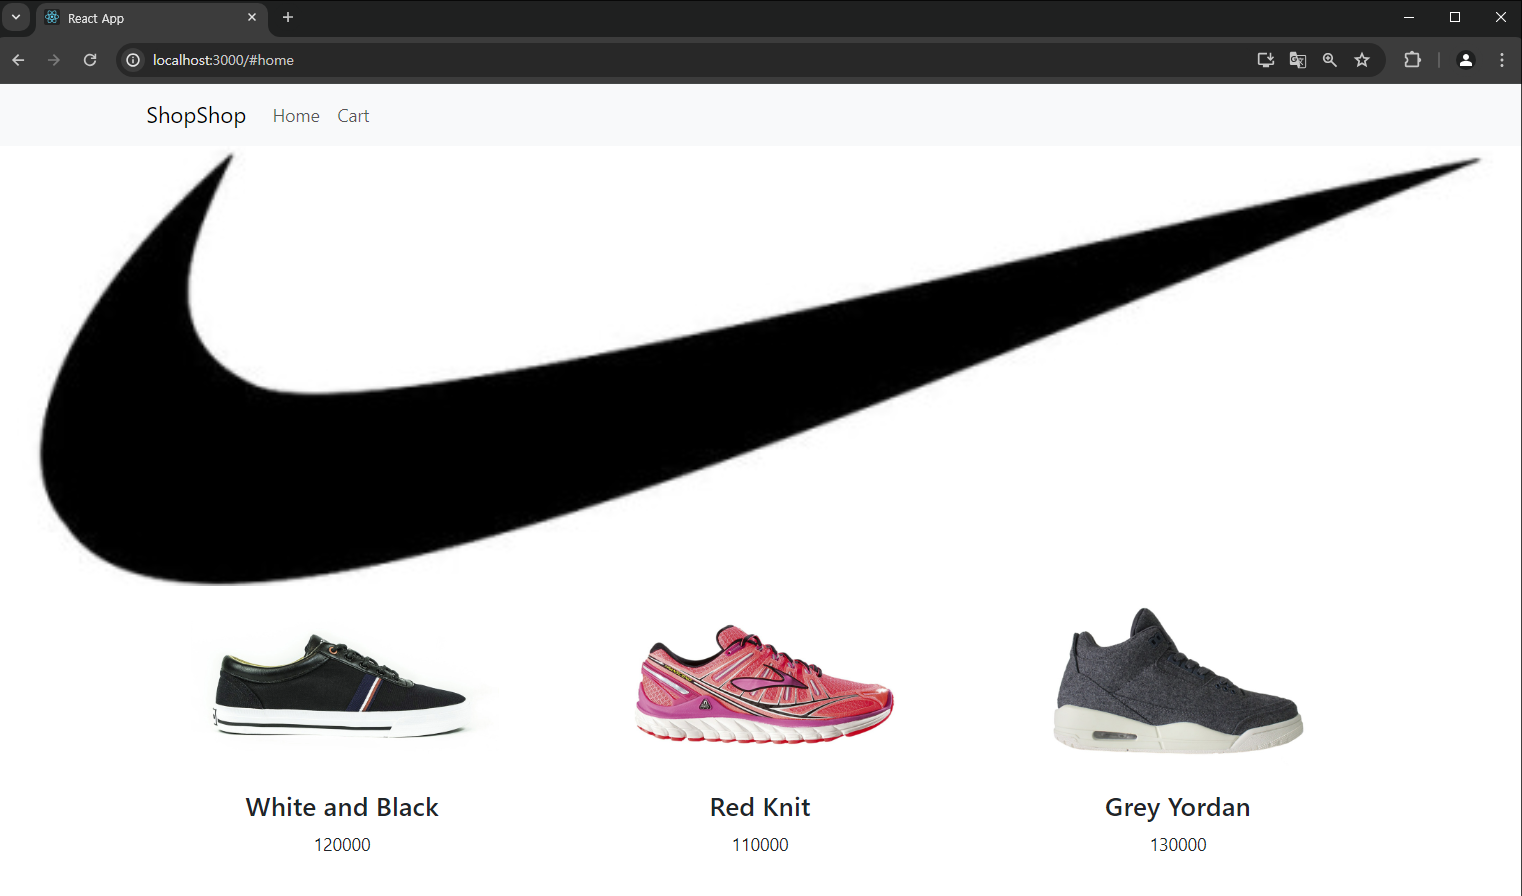
<div className='main-bg' style={{backgroundImage:'url(' + bg + ')' }}></div>
<div className='container'>
<div className='row'>
{
shoes.map(function(a, i){
return(
<Shoes shoes={shoes} num={i} img={img}></Shoes>
)
})
}
</div>
</div>
</div>
);
}
function Shoes(props){
return(
<div className='col-md-4'>
<img src={props.img[props.num]} width="80%"></img>
<h4>{props.shoes[props.num].title}</h4>
<p>{props.shoes[props.num].price}</p>
</div>
)
}
export default App;let data = [
{
id : 0,
title : "White and Black",
content : "Born in France",
price : 120000
},
{
id : 1,
title : "Red Knit",
content : "Born in Seoul",
price : 110000
},
{
id : 2,
title : "Grey Yordan",
content : "Born in the States",
price : 130000
}
]
export default data;
실행 결과
React 라우터 셋팅 및 기본
페이지 나누는 법
1. 컴포넌트 만들어서 상세페이지내용 채움
2. 누가 /detail 접속하면 그 컴포너트를 보여줌
react-router-dom 라이브러리 사용
라이브러리 설치 : npm install react-router-dom@6
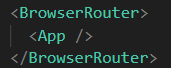
index.js - <BrowserRouter>태그 안에 <App> 넣기
* BrowerRouter도 import를 해준다
App.js - import { Routes, Route, Link} from 'react-router-dom' 입력
* 페이지 이동 버튼 : <Link>태그 사용, to로 경로 지정
import { Container, Nav, Navbar } from 'react-bootstrap';
import './App.css';
import bg from './img/bg2.jpg';
import { useState } from 'react';
import data from './data.js';
import { Routes, Route, Link} from 'react-router-dom'
//import Detail from './test.js'

function App() {

  let [shoes] = useState(data)
  let [img] = useState(['https://codingapple1.github.io/shop/shoes1.jpg', 'https://codingapple1.github.io/shop/shoes2.jpg', 'https://codingapple1.github.io/shop/shoes3.jpg'])

  return (
    <div className="App">

      <Navbar bg="light" data-bs-theme="light">
        <Container>
          <Navbar.Brand href="#home">ShopShop</Navbar.Brand>
          <Nav className="me-auto">
            <Nav.Link href="#home">Home</Nav.Link>
            <Nav.Link href="#features">Cart</Nav.Link>
          </Nav>
        </Container>
      </Navbar>

      <Link to="/">홈</Link>
      <Link to="/detail">상세페이지</Link>

      <Routes>
        <Route path='/' element={
          <>
          <div className='main-bg' style={{backgroundImage:'url(' + bg + ')' }}></div>
            <div className='container'>
              <div className='row'>
                {
                  shoes.map(function(a, i){
                    return(
                      <Shoes shoes={shoes} num={i} img={img}></Shoes>
                    )
                  })
                }
              </div>
            </div>
          </>
        } />
        <Route path='/detail' element={<Detail></Detail>} />
      </Routes>

    </div>
  );
}

function Detail(){
  return(
    <div className="container">
      <div className="row">
        <div className="col-md-6">
          <img src="https://codingapple1.github.io/shop/shoes1.jpg" width="100%" />
        </div>
        <div className="col-md-6">
          <h4 className="pt-5">상품명</h4>
          <p>상품설명</p>
          <p>120000원</p>
          <button className="btn btn-danger">주문하기</button>
        </div>
      </div>
    </div>
  )
}

function Shoes(props){
  return(
    <div className='col-md-4'>
      <img src={props.img[props.num]} width="80%"></img>
      <h4>{props.shoes[props.num].title}</h4>
      <p>{props.shoes[props.num].price}</p>
    </div>
  )
}

export default App;
실행 결과
React 라우터 (navigate, nested routes, outlet)
App.js - import { Routes, Route, Link, useNavigate, Outlet} from 'react-router-dom' 입력
useNavigate() : 페이지 이동을 도와주는 역할
let navigate = useNavigate() 로 변수 지정 - navigate('경로') = 해당 경로로 이동
* 경로대신 -1을 적으면, 전페이지로 이동
404페이지 설정
: <Route path='*' element={<div>없는 페이지</div>} />

nested Routes : 경로 안에 경로를 설정할 때, route태그 안에 route태그를 넣어서 설정

* 하지만, 이상태로 실행하면 /about/member를 들어가도 /about내용만 보인다
(/about 안에 /about/member내용을 넣는 방식, 하지만 /about만 보인다)
따라서 <About>컴포넌트 내용에 <Outlet>을 입력한다.
그러면 <Outlet>을 입력한 곳에 /about/member 내용이 들어간다
nested routes 사용 시기 : 페이지는 이동되지만, 몇가지만 변할 때 사용
import { Container, Nav, Navbar } from 'react-bootstrap';
import './App.css';
import bg from './img/bg2.jpg';
import { useState } from 'react';
import data from './data.js';
import { Routes, Route, Link, useNavigate, Outlet} from 'react-router-dom'
import Detail from './routes/Detail.js'

function App() {

  let [shoes] = useState(data)
  let [img] = useState(['https://codingapple1.github.io/shop/shoes1.jpg', 'https://codingapple1.github.io/shop/shoes2.jpg', 'https://codingapple1.github.io/shop/shoes3.jpg'])

  let navigate = useNavigate();

  return (
    <div className="App">

      <Navbar bg="light" data-bs-theme="light">
        <Container>
          <Navbar.Brand href="#home">ShopShop</Navbar.Brand>
          <Nav className="me-auto">
            <Nav.Link onClick={() => { navigate('/')}}>Home</Nav.Link>
            <Nav.Link onClick={() => { navigate('/detail') }}>Detail</Nav.Link>
          </Nav>
        </Container>
      </Navbar>

      <Routes>
        <Route path='/' element={
          <>
          <div className='main-bg' style={{backgroundImage:'url(' + bg + ')' }}></div>
            <div className='container'>
              <div className='row'>
                {
                  shoes.map(function(a, i){
                    return(
                      <Shoes shoes={shoes} num={i} img={img}></Shoes>
                    )
                  })
                }
              </div>
            </div>
          </>
        } />
        <Route path='/detail' element={<Detail />} />

        <Route path='/about' element={<About />}>
          <Route path='member' element={<div>멤버임</div>} />
          <Route path='location' element={<div>위치정보임</div>} />
        </Route>
        <Route path='/event' element={<Event />}>
          <Route path='one' element={<div>첫 주문시 양배추즙 서비스</div>} />
          <Route path='two' element={<div>생일 기념 쿠폰 받기</div>} />
        </Route>
      </Routes>

    </div>
  );
}

function Event(){
  return(

    <div>
      <h3>오늘의 이벤트</h3>
      <Outlet></Outlet>
    </div>

  )
}

function About(){
  return(
    <div>
      <h4>회사정보임</h4>
      <Outlet></Outlet>
    </div>
  )
}

function Shoes(props){
  return(
    <div className='col-md-4'>
      <img src={props.img[props.num]} width="80%"></img>
      <h4>{props.shoes[props.num].title}</h4>
      <p>{props.shoes[props.num].price}</p>
    </div>
  )
}

export default App;
실행 결과
React 라우터 (URL 파라미터)
* 경로 뒤에 :변수명 = URL 파라미터
받은 파라미터값은 useParams()로 받는다 (import 해야한다)

사용할 때는 {}를 벗기고 사용
* find() : array 자료안에서 원하는 항목만 찾아올 수 있습니다.
array자료.find(()=>{ return 조건식 }) 이렇게 쓰면 조건식에 맞는 자료를 찾아서 이 자리에 남겨줍니다.
import { Container, Nav, Navbar } from 'react-bootstrap';
import './App.css';
import bg from './img/bg2.jpg';
import { useState } from 'react';
import data from './data.js';
import { Routes, Route, Link, useNavigate, Outlet} from 'react-router-dom'
import Detail from './routes/Detail.js'

function App() {

  let [shoes] = useState(data)
  let [img] = useState(['https://codingapple1.github.io/shop/shoes1.jpg', 'https://codingapple1.github.io/shop/shoes2.jpg', 'https://codingapple1.github.io/shop/shoes3.jpg'])

  let navigate = useNavigate();

  return (
    <div className="App">

      <Navbar bg="light" data-bs-theme="light">
        <Container>
          <Navbar.Brand href="#home">ShopShop</Navbar.Brand>
          <Nav className="me-auto">
            <Nav.Link onClick={() => { navigate('/')}}>Home</Nav.Link>
            <Nav.Link onClick={() => { navigate('/detail') }}>Detail</Nav.Link>
          </Nav>
        </Container>
      </Navbar>

      <Routes>
        <Route path='/' element={
          <>
          <div className='main-bg' style={{backgroundImage:'url(' + bg + ')' }}></div>
            <div className='container'>
              <div className='row'>
                {
                  shoes.map(function(a, i){
                    return(
                      <Shoes shoes={shoes} num={i} img={img}></Shoes>
                    )
                  })
                }
              </div>
            </div>
          </>
        } />
        <Route path='/detail/:id' element={<Detail shoes={shoes}/>} />


      </Routes>

    </div>
  );
}

function Shoes(props){
  return(
    <div className='col-md-4'>
      <img src={props.img[props.num]} width="80%"></img>
      <h4>{props.shoes[props.num].title}</h4>
      <p>{props.shoes[props.num].price}</p>
    </div>
  )
}

export default App;
import { useParams } from "react-router-dom";
function Detail(props ){
let {id} = useParams();
let 찾은상품 = props.shoes.find(function(x){
return x.id == id
});
return(
<div className="container">
<div className="row">
<div className="col-md-6">
<img src="https://codingapple1.github.io/shop/shoes1.jpg" width="100%" />
</div>
<div className="col-md-6">
<h4 className="pt-5">{찾은상품.title}</h4>
<p>{찾은상품.content}</p>
<p>{찾은상품.price}원</p>
<button className="btn btn-danger">주문하기</button>
</div>
</div>
</div>
)
}
export default Detail;
실행 결과
'react' 카테고리의 다른 글
| React if문 작성 패턴, localStorage, react-query, PWA(앱 실행), async (0) | 2024.06.03 |
|---|---|
| React Styled-component, Lifecycle & useEffect, ajax, 동적 UI, transition) (0) | 2024.05.31 |
| React input, class (0) | 2024.05.30 |
| React 컴포넌트, 동적 UI, 박복문(map), props(state 자식과 부모) (0) | 2024.05.30 |
| React 개발 환경 세팅 및 실행, 레이아웃(JSX), state (0) | 2024.05.30 |